The safest way to program a ham radio with CHIRP is to confirm exact support, download first, save a clean backup, edit the downloaded image, validate transmit-related fields, and only then upload. A blank spreadsheet, similar-looking model profile, or assumed cable driver can cause connection failures or a damaged configuration. This guide covers CHIRP-next, CSV imports, clone-mode and live-mode differences, testing, troubleshooting, and recovery. It does not replace the manual or CHIRP instructions for your exact manufacturer, model, and variant.
How to Use CHIRP for Ham Radio Without Risking the Original Setup
The safest CHIRP workflow is download, save, edit, validate, upload, and test. That order matters. Starting with a blank file may feel cleaner, but it removes the model-aware structure that CHIRP needs to write a valid configuration back to the device.
I have seen new licensees pass the exam, buy a radio, and still not get on the air because programming became the stopping point. The solution is not to fill a large channel list faster. It is to create one controlled path from the radio to the computer and back, with a clean backup available before anything changes.
Research-Based: This workflow follows the current official CHIRP documentation checked on July 20, 2026. It has not been presented as a hands-on test of every supported radio, cable, operating system, or firmware variant.
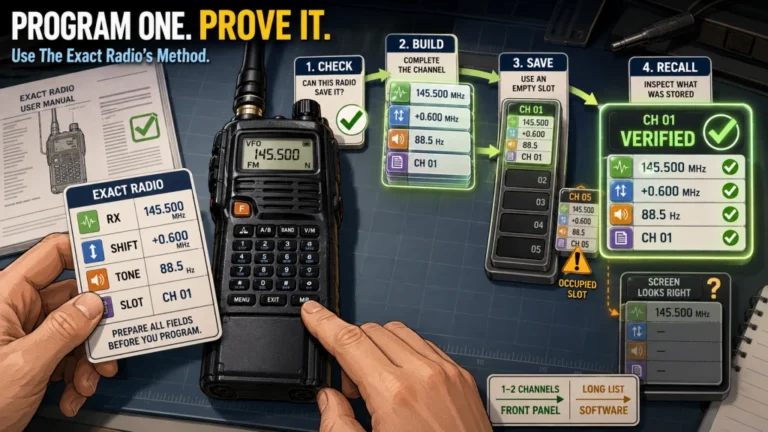
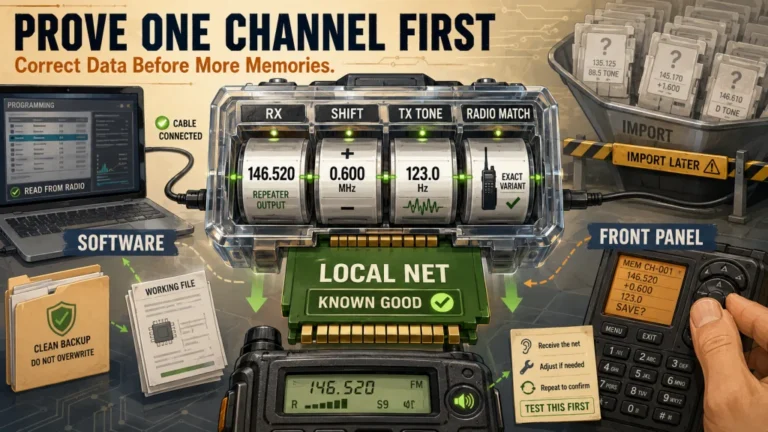
That single-channel test is the most useful safety gate in the whole process. Once the connection, model profile, memory fields, and upload sequence are proven together, adding more verified channels becomes ordinary editing instead of guesswork.
Pass the Compatibility Gate Before Installing or Connecting Anything
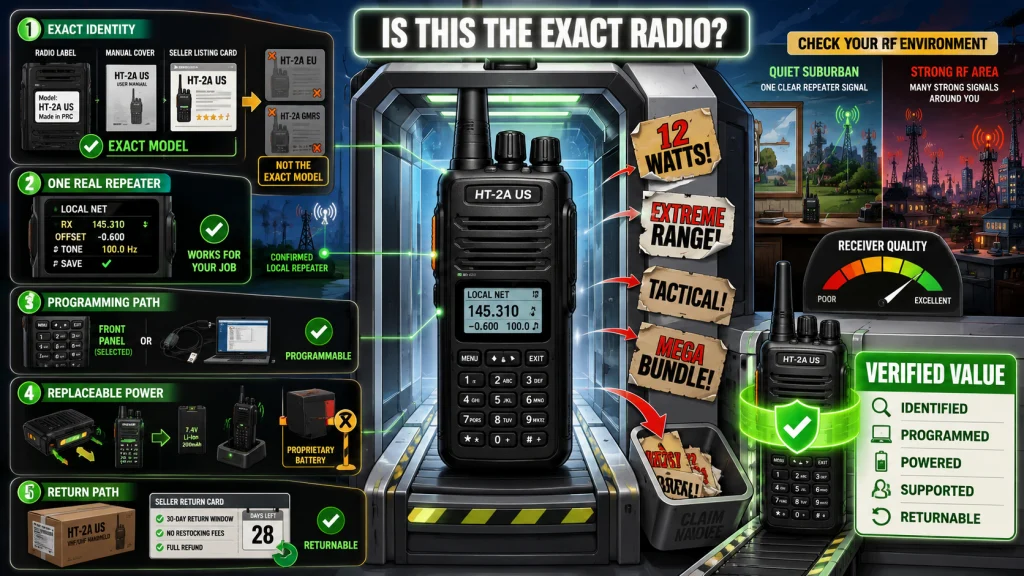
CHIRP support belongs to an exact radio identity, not a general family resemblance. Check the manufacturer, model number, regional suffix, hardware revision, and any firmware distinction shown on the radio or in its documentation. Then compare that identity with the official CHIRP supported-model list.
Do not select a similar profile because the menu name looks almost right. Two radios can share a case, keypad, or marketing family while using different memory layouts or cloning behavior. If the official list says to use another named driver, follow that instruction exactly; otherwise, a nearby name is not permission to substitute it.
The current list also marks some entries with an asterisk when a legacy driver has not been validated in CHIRP-next. That distinction changes the decision. It means you should read the current model notes and confirm the supported build rather than assuming that appearance on the list guarantees full support in the actively maintained software.
- Match the exact manufacturer and model.
- Check suffixes, regions, revisions, and firmware notes.
- Confirm whether the radio uses CHIRP-next or has a documented exception.
- Review which settings the driver can and cannot edit.
- Stop if the exact variant cannot be confirmed.
A support listing is a gate, not a promise that every feature is editable. Some radios expose memories but not all global settings, and some fields may be ignored because the radio does not support them. Knowing that before the first upload prevents you from treating a software limitation as a damaged radio.

BTECH UV-5X3 is a tri-band amateur handheld covering VHF, 1.25-meter, and UHF operation. BTECH provides a dedicated CHIRP programming workflow for this exact model, including downloading the existing radio configuration before editing memories. The radio provides 128 memory channels and is listed under its own BTECH UV-5X3 driver in CHIRP.
Check On AmazonIf you click this link and buy, we earn a commission at no additional cost to you.
A CHIRP-Next Guide Starts With the Official Current Build
Use the official CHIRP download page, not a third-party mirror, an old forum attachment, or a bundled installer from a cable seller. As of July 20, 2026, the project identifies CHIRP-next as the only actively maintained version and recommends the latest available build. The build date makes an outdated installation easy to recognize.
Legacy CHIRP still exists for limited cases where a driver has not been converted or validated, but it no longer receives normal model additions, fixes, or updates. Treat legacy use as a documented exception for an exact radio, not as the easier default because an older tutorial happens to show it.
Operating-system support also matters. Confirm that the current build supports your version of Windows, macOS, or Linux before troubleshooting the radio. If CHIRP will not launch correctly, solve the installation problem first; changing radio settings, drivers, or cables cannot fix an application that is not running normally.
Key Point: Update the software before diagnosing a radio that worked with an older build. A stale installation can preserve a bug that has already been fixed, while a current build gives you the best chance of matching current radio notes and driver behavior.
This is also where the broader complete ham radio programming workflow helps. CHIRP is one programming method, not a replacement for understanding what the memory is supposed to do once it reaches the radio.
Identify the Cable, Chipset, Connector, and Port as Separate Things
A programming cable is not just a wire with the right plug. It may contain a USB-to-serial chipset, require an operating-system driver, use the radio’s required voltage levels, and depend on the connector being seated more firmly than an audio plug. Treating all cables as interchangeable is one of the fastest ways to chase the wrong fix.
Start with the radio manual, the cable maker’s instructions, and the CHIRP programming cable guide. Identify the radio-side connector and the actual chipset reported by the operating system. Do not install an FTDI, Prolific, or other driver merely because a generic video says that every programming cable needs it.
If you still need a cable, choose by verified compatibility rather than plug shape. Confirm the exact radio or connector standard, identified chipset, and operating-system support. A fitting plug can still use the wrong pinout or interface.
Next, check which serial device appears when the cable is connected and disappears when it is removed. That comparison is more reliable than choosing the first port in the CHIRP list. Close other radio software, terminal programs, and background utilities that may already have the port open.
- Seat the radio-side plug fully and check both connector sections when the plug has more than one contact.
- Use the operating system to identify the device and port.
- Follow the driver instructions for the detected chipset, not an assumed chipset.
- Keep other applications from claiming the same serial port.
- Use the radio’s required power, volume, or clone-mode preparation from its exact instructions.
If the port never appears, CHIRP has nothing to connect to yet. If the port appears but the radio will not respond, move to connector seating, radio state, cable compatibility, and clone timing instead of repeatedly reinstalling random drivers.

BTECH PC03 is a USB-A programming cable for radios using the Kenwood K1 accessory jack. Amazon lists a genuine FTDI chipset, plug-and-play operation, and compatibility with CHIRP. Supported radios listed by Amazon include models such as the BTECH UV-5X3, BAOFENG BF-F8HP, and UV-82HP.
Check On AmazonIf you click this link and buy, we earn a commission at no additional cost to you.
Download From the Radio Before Editing Anything
Open CHIRP, choose Radio > Download From Radio, select the confirmed port, manufacturer, and exact model, then follow the prompts for that model. The CHIRP beginner workflow begins with a download because the resulting tab carries the driver and memory structure for that radio.
Do not type a large list before proving that CHIRP can read the device. A successful download confirms several things at once: the application can access the port, the cable can communicate, the radio is in the correct state, and the selected driver recognizes the transfer.
| Radio behavior | What CHIRP does | What changes in your workflow |
|---|---|---|
| Clone mode | Transfers the radio image as a complete block | Save the original image, edit the copy, then upload the revised image |
| Live mode | Reads and writes memories while connected | Changes may reach the radio as you make them, so export memories separately for backup |
A clone-mode radio usually requires a specific sequence of radio buttons, cable connection, power state, and software commands. A live-mode radio does not use the same all-at-once image process, so waiting for an upload step that does not exist can create confusion. Read the prompt CHIRP displays instead of forcing instructions from another radio onto yours.
For clone-mode equipment, immediately save the untouched download with a clear name that includes the radio identity and date. Then use Save As to create a working copy. For live-mode equipment, use the export method described in the official instructions so that the existing memories are preserved outside the radio before you begin.
Field Note: The backup is not busywork. New operators often focus on the channel list because that is the visible goal, but the original image is what turns a bad edit from a recovery problem into a simple file restore.
Build One Known-Good Memory Before Importing a Large List
Choose one verified local channel and enter it into the downloaded radio image. If you still need reliable repeater data, first find active local repeaters. CHIRP can store the values you give it, but it cannot prove that a directory entry is current, reachable from your location, or configured the way the repeater currently operates.
The first memory should be simple enough to inspect manually. Confirm the receive frequency, duplex direction, offset, tone mode, tone or code, emission mode, power setting, and channel name. The exact fields available depend on the radio driver, so use the CHIRP memory-column definitions together with your radio’s manual.
| Field | What it controls | Common mistake |
|---|---|---|
| Frequency | The receive frequency stored in the memory | Entering the repeater input instead of its output |
| Duplex | Simplex, positive shift, negative shift, split, or transmit disabled when supported | Using the right offset amount with the wrong direction |
| Offset | The amount of shift, or an absolute transmit frequency for a supported split channel | Treating the offset as the transmit frequency in every mode |
| Tone Mode | Whether and how a tone or code is used for transmit and receive squelch | Entering a tone value but leaving the mode set to none |
| Mode | The radio’s supported emission setting for that memory | Assuming FM and NFM are interchangeable |
| Power | The stored transmit power level when supported | Importing a generic default without checking the result |
| Name | The label displayed by the radio within its character limits | Using a name the radio truncates into something ambiguous |
The offset and tone values are not decorative spreadsheet columns. They define how the radio transmits through a repeater. The separate guide to understanding repeater offsets and tones explains how to interpret those values; this article stays focused on transferring verified values safely.
Where the driver supports it, set non-amateur or monitoring-only memories to transmit disabled. That reduces the chance of an accidental transmission, but the operator still remains responsible for using authorized frequencies and settings within license privileges.

Radioddity GA-510 is a dual-band VHF/UHF handheld with 128 memory channels and CHIRP programming support. It provides three selectable power levels and supports CTCSS, DCS, and DTMF functions used when building repeater memories. The package also includes a programming cable, allowing the radio to be configured from a computer as well as from its front keypad.
Check On AmazonIf you click this link and buy, we earn a commission at no additional cost to you.
Import CSV Data Into the Radio Image, Never Straight Into the Radio
A CSV file is generic tabular data. It is not a complete radio image and it does not contain every model-specific setting the driver may need. That is why CHIRP does not upload a CSV directly to a radio.
Open or download the target radio image first. Then use CHIRP’s import or copy-and-paste process to bring selected memories from the CSV into that target-radio tab. The official CHIRP CSV instructions also recommend letting CHIRP create the format rather than inventing columns in a general spreadsheet.
- Keep the clean original radio image closed and unchanged.
- Open the working radio image or download the target radio again.
- Open the CSV in a separate CHIRP tab.
- Import or copy only the memories you intend to use.
- Review the import preview and correct rejected or unsupported values.
- Inspect the result inside the target radio image before uploading.
External spreadsheet software can silently alter leading zeros, delimiters, decimal formatting, or text values. If you edit outside CHIRP, reopen the CSV in CHIRP before importing it. A file that looks tidy in a spreadsheet is not necessarily valid radio data.
Large lists also hide mistakes through volume. Import a small batch after the first verified channel works, check the channel order and fields, then expand. The fastest way to program hundreds of bad memories is to skip the ten minutes needed to validate one good one.
Validate the Image as a Radio Configuration, Not as a Spreadsheet
Before upload, stop looking only for empty cells and spelling errors. The dangerous mistakes are usually valid-looking values placed in the wrong relationship: a plus shift where a minus belongs, a tone value with the tone mode disabled, or a transmit-capable memory that was meant only for monitoring.
Use the radio image, the verified repeater information, and the radio manual together. CHIRP may reject values that the driver knows the radio cannot accept, but software validation does not prove that a channel is lawful, locally correct, or useful from your location.
- Confirm the tab identifies the exact radio driver, not a generic CSV.
- Check receive frequency, duplex direction, and offset as one set.
- Check tone mode and tone or code as one set.
- Review mode, power, scan behavior, and channel name.
- Look for unsupported fields changed during import.
- Keep monitoring-only entries transmit disabled when supported.
- Confirm the channel order does not overwrite memories you intended to keep.
- Save the edited image under a new versioned filename.
Name each file for the physical radio, original or test status, and revision. For multiple units, keep a separate folder or unit label for each one rather than organizing only by model name.
If the driver exposes a Settings tab, review it separately and change only planned, understood values. Controls vary by driver and can affect scan, VFO, DTMF, display, or other global behavior. Do not copy unfamiliar settings from another radio.
Warning: Do not upload an image downloaded from one radio into a different unit merely because the two units share a model name. Serial-specific settings, firmware differences, or calibration-related data may exist outside the visible memory rows. Start by downloading from the actual target radio.
If computer programming is not appropriate for the radio or situation, use the separate instructions to program a radio without a computer. A slower manual method is better than forcing an unsupported software path.
Upload Once, Then Test the Radio Instead of Trusting the Progress Bar
For a clone-mode radio, open the validated working image, choose Radio > Upload To Radio, select the confirmed port, and follow the exact sequence for that model. Do not disconnect the cable, remove power, or press unrelated controls during the transfer. For live-mode radios, watch the status indication until all edits have synchronized.
A completed transfer only proves that data moved. It does not prove that the repeater data is correct or that every channel behaves as intended. Reboot or exit clone mode as directed, then inspect several memories from different parts of the list on the radio itself.
- Confirm the channel name and receive frequency on the display.
- Check the stored shift direction and tone settings through the radio menu when practical.
- Monitor the frequency long enough to confirm normal activity and avoid interrupting a conversation.
- Make one lawful test at the lowest practical power that completes the communication.
- Identify as required and confirm that the repeater response or contact behaves as expected.
The FCC requires amateur stations to use the minimum transmitter power necessary for the communication. A low-power test also limits the impact of a mistake. Keep the test within your license privileges, avoid transmitting on monitoring-only channels, and do not use a repeater test as an excuse to key repeatedly without listening.
After that test channel works, test a few channels that use different combinations, such as simplex versus repeater or tone versus no tone. You do not need to transmit on every memory. You do need enough checks to catch a systematic error before trusting the entire file.

BAOFENG BF-F8HP is a dual-band VHF/UHF handheld with three selectable transmit power levels. Amazon lists High, Medium, and Low settings at 8W, 4W, and 1W, giving the radio a low-power setting for controlled post-programming tests. The BF-F8HP is also included in the current CHIRP supported-radio list.
Check On AmazonIf you click this link and buy, we earn a commission at no additional cost to you.
Troubleshoot by Failure Stage Instead of Changing Everything at Once
CHIRP radio programming becomes much easier to diagnose when you identify where the process stopped. An installation failure, missing serial port, failed download, rejected value, failed upload, and nonworking repeater memory are different problems. Treating them as one vague cable issue wastes time and can introduce new variables.
| Failure point | Likely checks | What not to do |
|---|---|---|
| CHIRP will not start | Current build, supported operating system, installation instructions | Change radio settings or install random cable drivers |
| No serial port appears | USB detection, cable chipset, driver status, physical USB connection | Select an unrelated port and keep retrying |
| Port is busy | Other radio software, terminal tools, background utilities | Reinstall CHIRP before closing the competing application |
| Radio does not respond | Exact driver, connector seating, cable compatibility, power state, clone timing | Select a similar radio profile |
| Download works but upload fails | Required upload sequence, radio waiting state, unchanged target radio, current build | Upload a different model’s image |
| Upload completes but channel fails | Frequency, duplex, offset, tone mode, tone value, repeater status, local reach | Blame the cable after a successful transfer |
Change one variable at a time and repeat the smallest test that can prove or disprove it. If reseating the connector fixes the download, do not also replace drivers and change model profiles, because you will no longer know which action mattered.
Use the exact radio notes, CHIRP FAQ, and current issue-reporting process when the failure appears driver-specific. For problems beyond programming, the guide to diagnosing ham radio problems separates programming errors from antenna, power, audio, and operating issues.
Recover From the Saved Original Instead of Guessing at Factory Settings
If the edited image produces wrong behavior, stop adding more changes. Compare it with the saved original and identify whether the problem is limited to a few memories or affects broader settings. A clean original gives you a known return point; a factory reset may erase useful defaults without recreating the exact state you had before programming.
For a clone-mode radio, follow the same validated upload sequence and write the untouched original image back to the same target radio. For live-mode equipment, restore from the export or reverse only the documented changes. Do not use an image from another unit as a substitute backup.
If CHIRP cannot communicate after a failed transfer, return to the instructions for that model before attempting another write. Confirm power, clone mode, port, cable seating, and the current supported driver. Repeated uploads with changing profiles are more likely to obscure the original problem than solve it.
Key Point: Recovery is part of the workflow, not an admission that programming failed. The best configuration process assumes an edit can go wrong and preserves a verified route back before the first change is made.
Once the original is restored, repeat the one-memory test. That smaller cycle tells you whether the failure came from connection timing, the image, the imported data, or one specific field without putting the entire channel plan at risk again.
Final Thoughts: Prove One Complete Programming Cycle First
The reliable way to use CHIRP is not to treat it as a faster spreadsheet. Treat it as a model-aware transfer tool. Confirm the exact radio, use the current official software, identify the real cable and port, download first, preserve the original, and make one verified memory work from beginning to end.
Only after that cycle succeeds should you import a larger list. The size of the list is not the measure of a good configuration. A small file with correct receive frequency, shift, tone, transmit permissions, and a tested recovery path is more useful than hundreds of unverified memories that merely uploaded without an error.
FAQs
💾 Do I have to download from the radio before using CHIRP?
Yes, that is the safe default and the official basic workflow. The download creates or opens the correct structure needed for that radio and gives clone-mode users an original image to save before making changes.
📄 Can I upload a CSV file directly to my radio?
No. A CSV is generic data, not a complete radio image. Open or download the target radio first, then import or copy the CSV memories into that target-radio tab before uploading.
🔌 Why does CHIRP say it cannot communicate with my radio?
Check the exact model selection, serial port, connector seating, cable compatibility, radio power state, and required clone timing. Do not assume the driver is the problem until the operating system can see the cable and no other application is using the port.
🧩 Can I choose a similar model when my exact radio is not listed?
Only when the official CHIRP supported-model list explicitly tells you to use another driver. A similar name or case does not prove that the memory layout and cloning protocol are compatible.
🛡️ What is the most important backup to save?
For a clone-mode radio, save the untouched image downloaded from that exact unit before editing. Keep it separate from the working copy so you can restore the known original instead of guessing at factory settings.
📻 How should I test channels after uploading?
Inspect several memories on the radio, monitor before transmitting, and make one lawful test on a verified channel at the lowest practical power. Confirm the stored shift and tone behavior instead of assuming that a completed progress bar means the channel is correct.