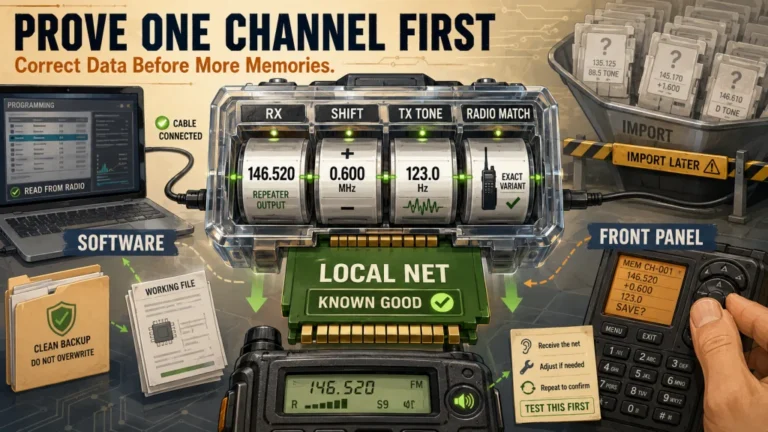
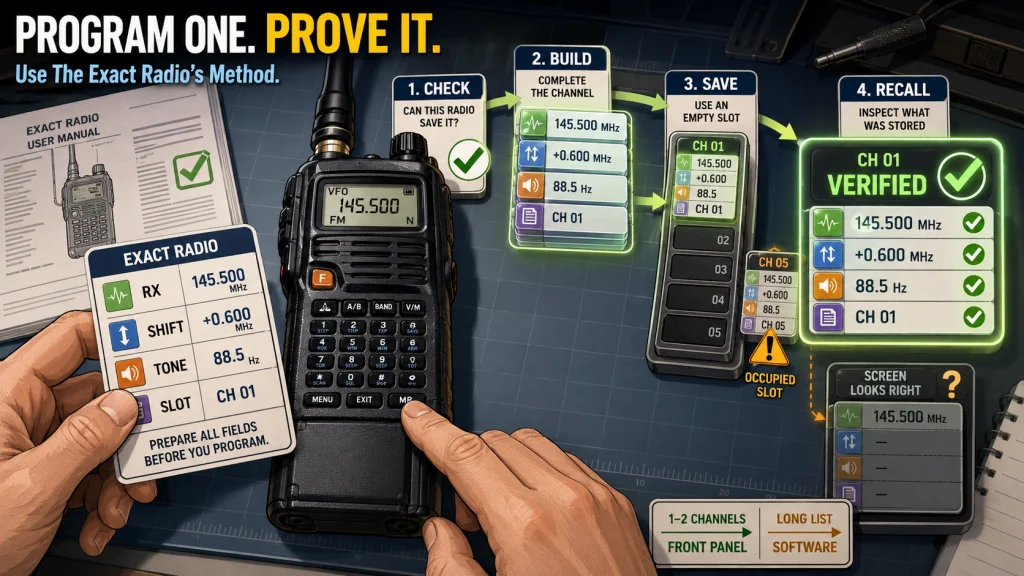
You can program a ham radio without a computer when the exact radio supports front-panel memory editing and you only need to add or change a small number of channels. The reliable method is not a universal button sequence. First confirm what the radio can save from its controls, write down the complete channel data, build one memory in frequency mode, then recall and inspect the saved result. For larger channel lists, repeated naming, radio cloning, or dependable backups, software is usually the better tool.
How to Program a Ham Radio Without a Computer
Learning how to program a ham radio without a computer is useful in the field, after a repeater change, or whenever a cable and software are unavailable. It works best when the job is small: one local repeater, one simplex frequency, or one temporary memory. The mistake is treating front-panel programming as though every handheld and mobile radio follows the same keypad recipe.
I treat the process as four separate checks: capability, channel data, storage, and verification. If any one of those is skipped, the display may look correct while the saved memory is incomplete. A frequency on the screen is not proof that the radio stored the right shift, tone, mode, power level, or transmit frequency.
Method: Research-based. The workflow below applies across common radio designs, but the button labels, menu names, save behavior, and available settings must be confirmed in the manual for the exact radio and variant.
This article covers front-panel memory entry for a small number of analog or supported digital channels. It does not provide universal menu numbers, explain how to calculate repeater settings, or replace the exact operating manual. For the wider decision between keypad entry, manufacturer software, and cross-radio tools, start with the complete ham radio programming guide.
Check What the Exact Radio Can Do From the Front Panel
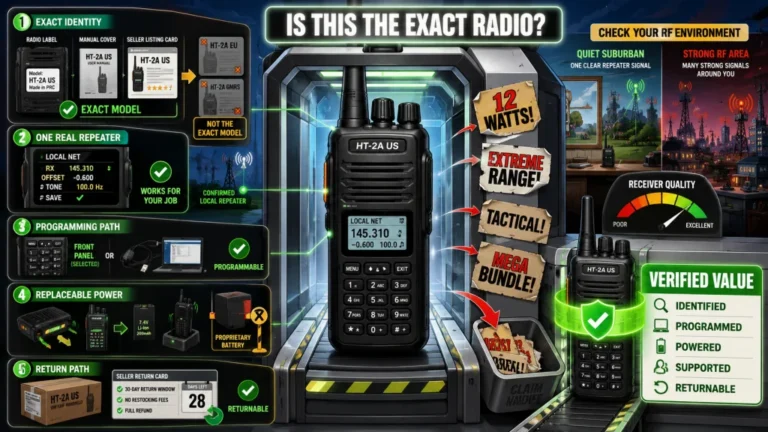
Before entering a frequency, find the memory-programming section of the manual for the exact model and regional variant. Do not stop when the manual says the radio can recall memories. You need to confirm whether it can create, edit, name, overwrite, and delete them from the front panel, because those are separate capabilities.
Some radios allow complete memory creation from the keypad or control knobs. Others let you save a basic frequency but reserve names, digital contact data, channel grouping, or certain signaling options for software. A third group can edit some fields only after the memory is copied back into VFO mode. Knowing that limitation before you start prevents an hour of searching for a menu that does not exist.
| Capability to confirm | Question to answer in the manual | Why it changes the workflow |
|---|---|---|
| Create a memory | Can a new channel be stored directly from VFO or frequency mode? | If not, software may be required even for the first memory. |
| Edit a saved memory | Can individual fields be changed, or must the channel be rebuilt? | Rebuilding creates a greater risk of overwriting the wrong slot. |
| Name a channel | Can an alphanumeric label be entered from the radio? | A working unnamed memory may be acceptable for one channel but confusing in a larger list. |
| Set tone behavior | Can transmit tone and receive tone be selected independently? | A radio may support tone encode while limiting more complex tone combinations. |
| Store an odd split | Can a separate transmit frequency be saved instead of a standard offset? | Not every repeater or channel pair can be represented by a simple plus or minus shift. |
| Delete or clear a memory | Can an occupied slot be cleared from the front panel? | A mistaken save may be difficult to undo without software. |
| Program both sides | Does a dual-receive radio save the active side only? | A correct memory can appear on one side while the other side remains unchanged. |
The decision rule is simple: if the manual does not explicitly show how a field is stored, do not assume the radio saves it. Similar-looking radios can use different menu labels, different save sequences, and different rules for occupied memories. Even variants within the same family may not behave identically.
Field Note: I have seen the practical gap between passing the license exam and programming the first radio. Breaking the job into capability, data, storage, and verification makes that gap manageable because the operator can identify which part is blocking progress instead of pressing more buttons at random.

Icom IC-V86 is a VHF amateur handheld that allows settings to be changed directly from the radio without requiring PC programming. Icom lists 200 memory channels plus built-in CTCSS and DTCS encoding and decoding. The rotary control can also switch between VFO and memory-channel operation.
Check On AmazonIf you click this link and buy, we earn a commission at no additional cost to you.
Write Down the Complete Channel Before Touching the Keypad
Front-panel ham radio programming becomes much easier when the radio is the last step, not the place where you work out the channel. Put every required value on paper or in a note first. That separates a data problem from a menu problem and gives you something concrete to compare with the saved memory.
For a repeater, begin with a verified listing and confirm that it is current for your area. The receive or output frequency alone is not enough. Use a dependable method for finding active local ham repeaters, then record the following fields before programming:
- Receive frequency, usually the repeater output you listen to.
- Transmit frequency, or the shift direction and offset used to reach it.
- Transmit access tone or code, when the repeater requires one.
- Receive tone or code, only when you intend to filter what opens your squelch.
- Analog or digital operating mode supported by both the channel and the radio.
- Bandwidth or deviation setting when the system and radio require a choice.
- Transmit power selected for the expected path, starting with the lowest practical level.
- An unused memory number and a short channel name if front-panel naming is supported.
The most commonly confused pair is transmit tone versus tone squelch. A transmit-only tone opens a repeater that requires access signaling, while tone squelch also controls what your receiver accepts. Menu labels such as Tone, TSQL, CTCSS, Encode, Decode, or Cross are not universal, so verify the terms in the manual and use the repeater offset and tone guide when the channel data itself is unclear.
Also distinguish a standard offset from a separate transmit frequency. A plus or minus shift tells the radio to calculate transmit frequency from the receive frequency. An odd split stores the transmit side independently. If the channel requires an odd split and the radio cannot save one from the front panel, a standard offset that happens to look close is not an acceptable substitute.
A Generic Sequence to Program a Repeater From the Radio Keypad
The order below is a workflow, not a promise that the keys appear in this order on every radio. Some radios open a menu for each value, while others use function keys, control knobs, long presses, or a second save operation. Keep the manual open and translate each step into the controls used by your exact radio.
The core principle is to finish the operating configuration before storing the memory. Saving too early often captures only the receive frequency, leaving the shift, tone, mode, or power at a previous value.
1. Protect the Existing Memory
Recall the memory slot you plan to use and write down what is already there. If the slot is occupied, choose another one unless you are certain the old channel is no longer needed. On a radio that requires overwriting before renaming or clearing, this record is your only quick path back.
Then switch to the correct VFO or frequency mode. Confirm the active band, active side, and display line before entering anything. Dual-receive radios can accept perfect settings on the wrong side, which makes the new channel seem to disappear when you return to the memory list.
2. Build the Receive and Transmit Path
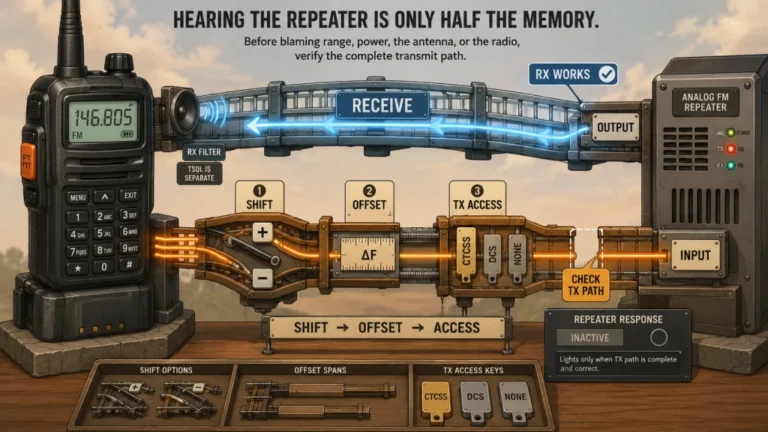
Enter the repeater output frequency first, because that is the frequency you normally monitor. Next set the duplex direction and offset, or enter the separate transmit frequency if the radio supports the required split. Do not rely on an automatic repeater shift unless you have confirmed that it selected the correct direction and spacing.
If the radio offers a reverse or transmit-frequency display, use it before saving. The expected transmit frequency should match the value on your worksheet. This single check catches a wrong sign, wrong offset, or wrong band before the error is buried inside a memory.
3. Set Tone, Mode, Bandwidth, and Power
Select the signaling mode first, then enter the tone or code value. A correct number attached to the wrong tone mode still produces a wrong channel. For example, choosing tone squelch when only transmit encode is intended can make a working repeater sound silent because the receiver is waiting for a matching tone.
Set analog or digital mode, bandwidth, and transmit power only when those choices are available and relevant on the exact radio. Start with low power for a nearby repeater and raise it only when the path requires more. Power is not part of repeater access data, but saving a needlessly high setting into every memory wastes battery and can hide whether the lower setting would have worked.
4. Store, Recall, and Inspect
Store the completed configuration in the unused memory slot. Some radios save all settings in one operation. Others require a second pass for the transmit side, a separate naming step, or another confirmation when the destination memory is occupied.
Leave VFO mode, recall the new memory, and inspect it as a saved channel. Check the displayed receive frequency, memory number, mode, tone indicator, shift indicator, power level, and name. If the radio can reveal the transmit frequency without transmitting, verify that as well.

Radioddity GA-510 is a dual-band handheld that supports full manual programming from its front keypad. Radioddity documents keypad entry for repeater frequency, transmit power, CTCSS tone, shift direction, frequency offset, and memory storage. The radio provides 128 channels and also supports computer programming when a larger channel job calls for it.
Check On AmazonIf you click this link and buy, we earn a commission at no additional cost to you.
Two Manual-Verified Examples Show Why the Exact Model Matters
These examples are included to show how two legitimate front-panel workflows differ, not to recommend either radio. Both are research-based and checked against the manufacturers’ operating instructions. Use the manual for the exact model, regional version, and firmware in your hands because button labels and page numbers can change between editions.
Example 1: Yaesu FT-65R and FT-65E Memory Storage
In the FT-65R and FT-65E operating manual edition that uses the V/M key for memory storage, the operator first finishes the frequency, CTCSS or DCS setting, repeater offset, and desired power level in VFO mode. Holding V/M displays a blank memory, the up or down key changes the destination, and the keypad can add a channel tag. Holding V/M again stores the completed settings, with MEM-IN blinking as confirmation.
The important lesson is that the save command comes after the channel is fully configured. The manual then uses a separate press of V/M to enter memory mode and recall the saved channel. Do not transfer that key sequence to another Yaesu model, or even to an FT-65 variant whose supplied manual shows different control labels.
Example 2: Icom IC-V86 and IC-U86 Memory Programming
The IC-V86 and IC-U86 basic manual uses a different pattern. After setting the frequency and other channel data in VFO mode, the operator presses FUNC and then VFO/MR/CALL to enter Memory Programming mode, selects a destination with the up or down key, then presses FUNC and holds VFO/MR/CALL for one second to write the channel. Three beeps confirm the programming operation.
Channel naming is not folded into that same save sequence. The advanced manual treats display type and channel-name programming as separate operations. That difference is exactly why a universal cheat sheet fails: one radio may offer tagging during storage, while another requires the memory to be saved first and named through another mode.

Yaesu FT-65R is a compact VHF and UHF handheld transceiver with 200 programmable channels. Yaesu provides model-specific operating and advanced manuals along with an official FT-65R memory programmer. Verified product data identifies the radio as the FT-65R and lists selectable transmit operation for its amateur VHF and UHF bands.
Check On AmazonIf you click this link and buy, we earn a commission at no additional cost to you.
Common Manual Ham Radio Programming Errors
Most front-panel failures are not mysterious radio faults. They come from saving at the wrong point, misunderstanding one field, or checking the VFO instead of the stored memory. The display may therefore look almost right while the channel fails in one specific way.
Use the symptom to narrow the error instead of rebuilding the channel immediately:
| Symptom | Likely mistake | What to inspect |
|---|---|---|
| You hear the repeater but cannot open it | Wrong shift, offset, transmit frequency, or access tone | Inspect the transmit path and tone encode setting. |
| The repeater appears silent even when others report activity | Receive tone or tone squelch was enabled incorrectly | Temporarily remove receive filtering and listen again. |
| The channel works in VFO mode but not from memory | The memory was saved before all settings were applied | Recall the memory and compare every field, not the VFO. |
| The new channel replaced a useful one | An occupied memory was selected | Restore from written notes or a previous backup if available. |
| The channel cannot be found after saving | It was stored on the other band, side, bank, or memory group | Check the active side and memory organization described in the manual. |
| The name is missing but the channel works | Naming requires a separate save or is unavailable from the front panel | Confirm the naming procedure and capability before rebuilding the channel. |
One of the easiest errors is remaining in VFO mode after the apparent save. The frequency still appears on screen, so the operator assumes the memory is complete. Switching to memory mode and recalling the slot is the only reliable way to prove that the radio stored what you intended.
Another trap is transferring menu numbers from a different radio or variant. A familiar number may control a completely unrelated feature, or the same feature may be stored through a different sequence. Use the function name as the concept, then find that function in the correct manual.
Use a Model-Specific Field Card, Not a Universal Cheat Sheet
A short field card is more useful than a long generic programming guide when you need to make a change away from home. The card should describe the exact controls on your radio and only the tasks you are likely to perform, such as creating one analog repeater memory, changing a tone, or restoring an original channel.
Keep the card short enough to follow under poor light or time pressure. A useful sequence contains the mode change, required menu names, save action, recall action, and verification action. It should not try to document every feature in the manual.
- Write the exact radio model and variant at the top.
- Use menu names and key labels from the current manual.
- Leave blanks for frequency, shift, offset, tone, power, and memory number.
- Record the original contents of any memory before changing it.
- Note whether naming and deletion require separate steps.
- Include the command for recalling and inspecting the saved memory.
- Update the card when firmware or operating behavior changes.
The card is not a replacement for a backup. It is a field procedure that reduces mistakes when only a small change is needed. If the radio contains a carefully organized channel list, avoid experimenting with occupied memories unless you have a reproducible copy elsewhere.
I would rather carry a six-line card that has been checked against one radio than a laminated page claiming to program every keypad radio. The shorter card has a narrower job, but it is far less likely to send you into the wrong menu.
Verify the Saved Channel Before Repeated Test Transmissions
Begin with receive-only checks. Recall the memory, confirm the indicators, and listen during known local activity or a scheduled net. If the radio offers reverse, monitor, or transmit-frequency inspection without sending a signal, use that feature to verify the transmit path.
When a brief on-air test is appropriate, start on low power and identify normally with your call sign. Avoid repeated unmodulated key-ups while changing settings. One controlled test gives better information than several rapid transmissions because you can change one variable at a time and observe the result.
Save a frequency, press transmit repeatedly, then change the offset, tone, and power together when the repeater does not respond.
Recall the saved memory, inspect each field, confirm the calculated transmit frequency, listen first, then make one brief identified test on low power.
A repeater response confirms that the transmit path probably reached the system, but it does not prove every saved field is ideal. Check that receive audio behaves as expected, the channel remains correct after power cycling when practical, and the radio recalls the same settings later.
If the radio does not expose enough information to verify the saved channel, compare it with the manual and rebuild the memory from the worksheet. Guessing becomes especially risky when the display shows only a channel name and hides the underlying frequency or tone values.
When Ham Radio Programming Without CHIRP Stops Making Sense
Front-panel entry is a strong skill for one or two changes. It becomes the wrong tool when the job requires consistency across many memories. Re-entering the same tone, name, power level, and grouping by hand increases the chance of a small error that is difficult to spot on a limited display.
Choose software when you need to load a long repeater list, organize channels into banks, rename many memories, clone several radios, compare configurations, or preserve a known-good backup. In that situation, use the step-by-step CHIRP programming method only after confirming that the exact radio and variant are supported and that the correct download-first workflow is followed.
| Programming job | Front panel is usually reasonable | Software is usually better |
|---|---|---|
| Add one nearby repeater | Yes, when full memory creation is supported | Optional |
| Change one access tone in the field | Yes, when the saved memory can be edited or rebuilt safely | Not necessary for the single change |
| Load dozens of channels | Possible on some radios but slow and error-prone | Yes |
| Name and group many memories | Often tedious or partly unsupported | Yes |
| Clone several matching radios | No practical advantage | Yes, with a verified process and compatible configuration |
| Maintain a recoverable backup | Written notes protect only selected channels | Yes |
The choice is not a contest between traditional skill and software. Front-panel programming gives you independence for small changes, while software gives you scale and repeatability. A prepared operator should know which method creates less uncertainty for the specific job.
Even when software is your normal method, build one known-good memory from the radio controls before you need the skill in the field. That one verified channel teaches you where the radio places its shift, tone, mode, power, save, and recall controls without risking the entire memory list.

BTECH PC03 is a USB-A programming cable for radios using the Kenwood K1 accessory jack. Amazon lists a genuine FTDI chipset, plug-and-play operation, and compatibility with CHIRP. Supported radios listed by Amazon include models such as the BTECH UV-5X3, BAOFENG BF-F8HP, and UV-82HP.
Check On AmazonIf you click this link and buy, we earn a commission at no additional cost to you.
Final Thoughts: Save One Complete Memory, Then Prove It Works
Manual programming is reliable when the task matches the radio’s actual front-panel capabilities. Confirm the exact model, prepare the complete channel data, configure the receive and transmit path in VFO mode, save to an unused memory, then recall and inspect the result. That sequence matters more than memorizing menu numbers from someone else’s radio.
For a small field change, the keypad may be the fastest and most dependable option. For a large, organized channel plan, software provides the backup and repeatability that a front panel cannot. In either case, the standard should be the same: one known-good memory that survives recall and verification is worth more than a screen full of channels you have not checked.
FAQs
📻 Can every ham radio be programmed from the front panel?
No. Some radios support complete memory creation, while others limit naming, digital data, grouping, deletion, or memory editing to software. Check the memory section of the exact model’s manual before starting.
⌨️ Can I program a repeater using only the radio keypad?
Often, yes, when the radio supports front-panel memory creation. You still need the verified output frequency, transmit path, tone settings, mode, and an unused memory slot.
🔁 Should I enter the repeater input or output frequency first?
Most generic workflows begin with the repeater output frequency that you receive, then add the shift and offset or a separate transmit frequency. Follow the exact manual if the radio uses a different split-memory procedure.
🔊 Why can I hear the repeater but not transmit through it?
Inspect the shift direction, offset or transmit frequency, and transmit access tone. Hearing the output proves the receive side is working, not that the radio is transmitting on the correct input.
🔒 What is the difference between Tone and TSQL?
On many radios, Tone means transmit encode only, while TSQL adds receive tone filtering. Labels vary, so confirm the exact behavior in the manual rather than relying on the abbreviation alone.
💾 Do I need software if I only program one channel?
Not necessarily. Front-panel entry is often reasonable for one channel when the radio supports every required field. Software becomes more useful when you need many channels, consistent names, grouping, cloning, or a recoverable backup.
🧭 Why did my saved channel disappear?
It may have been stored on the other VFO side, band, bank, or memory group, or it may never have been saved. Return to memory mode and follow the manual’s recall procedure before entering the channel again.